Sending eDocuments after upgrading to version 28.0
This guide explains what you need to do to keep sending electronic sales documents (eDocuments) after upgrading to Continia version 28.0.
What changed in version 28.0
From version 28.0, all eDocuments are sent through Continia Document Output. Previously, eDocuments could also be sent directly from Continia Document Capture; that path is being replaced.
What you need to do after upgrading depends on which Continia products you were using before the upgrade.
Find your scenario
Use the table below to find the section that applies to you.
| Your situation before upgrading | Go to section |
|---|---|
| I used only Document Capture | Scenario A |
| I used both Document Capture and Document Output, and sent eDocuments from both | Scenario B |
| I used only Document Output | Scenario C |
| I am new to Continia Document Output or Document Capture | New users |
Scenario A – you previously used only Document Capture
When you upgrade to version 28.0, Continia Document Output is installed automatically, but it is not activated or configured. Because of this, your existing eDocument sending will stop working until you activate and set up Document Output.
To continue sending eDocuments, complete the steps below.
Step 1 – start the setup
You can start the setup in two ways.
From the Role Center notification
After upgrading, a notification appears in the Role Center that guides you through activation and setup.
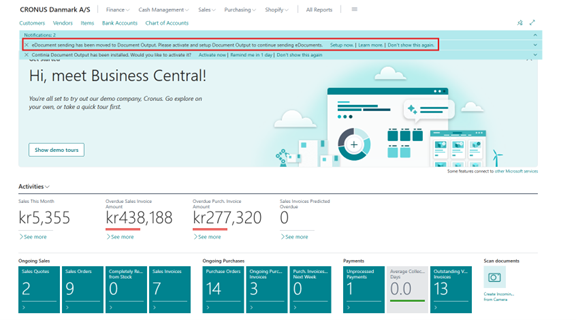
- Select Set up now to begin.
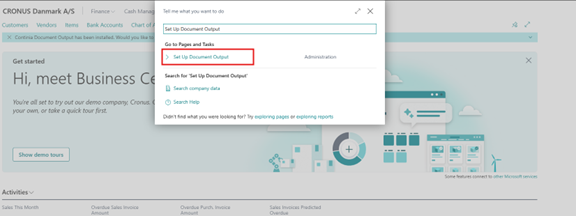
Manually from search
In Business Central, open Search.
Search for Set Up Document Output.
Open the guide.
Step 2 – activate Document Output
If Document Output has not been activated yet, activation starts automatically when you open the setup guide.
Hinweis
The activation needs to be done by the Continia partner.
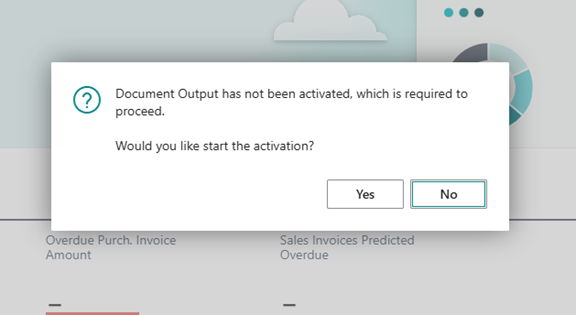
- Select Yes to continue.
The activation guide opens.
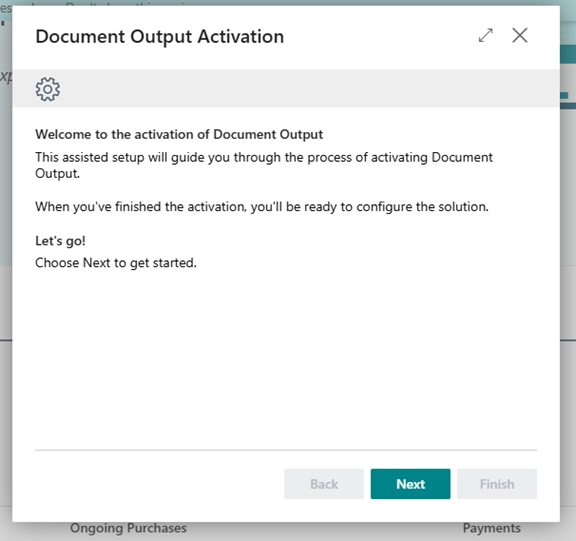
Follow the activation steps and complete the guide.
When activation is finished, the setup guide opens automatically.
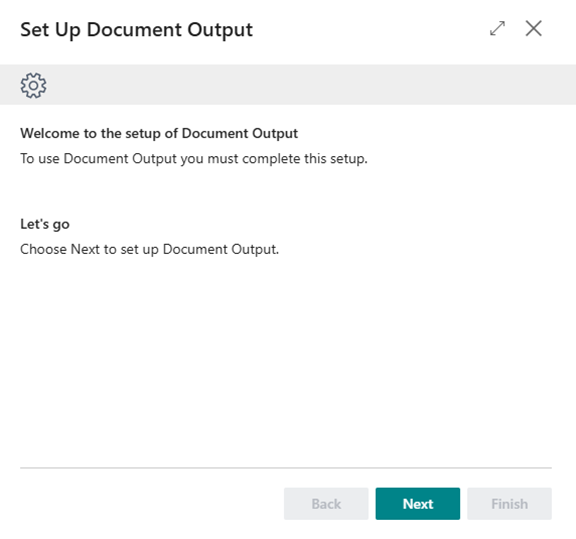
Step 3 – complete the Document Output setup
The setup guide walks you through the required configuration.
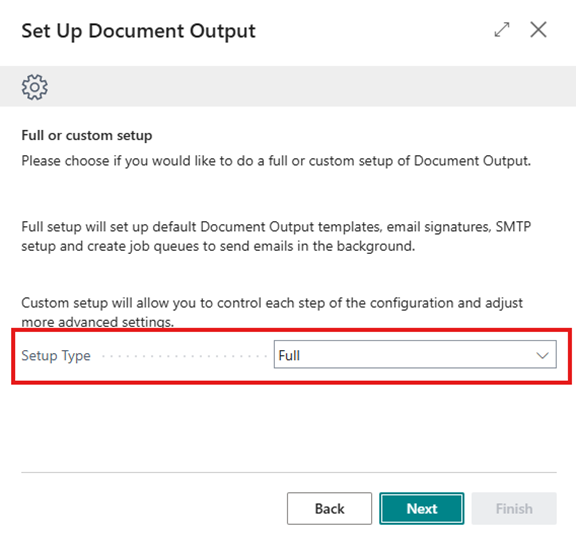
- Select your preferred setup type. For most users, Full setup is recommended.
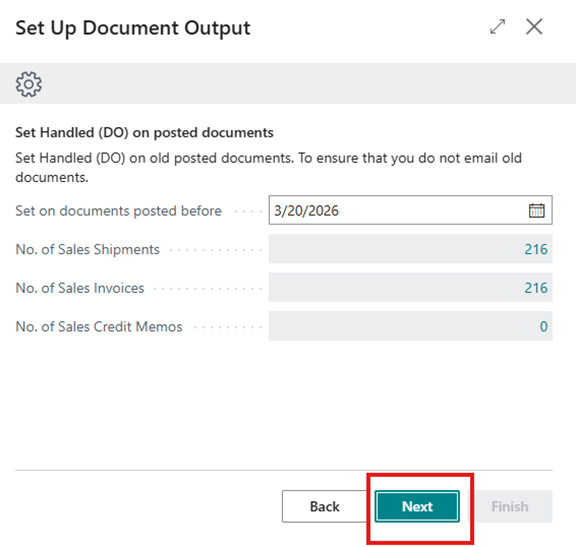
- Continue through the setup steps.
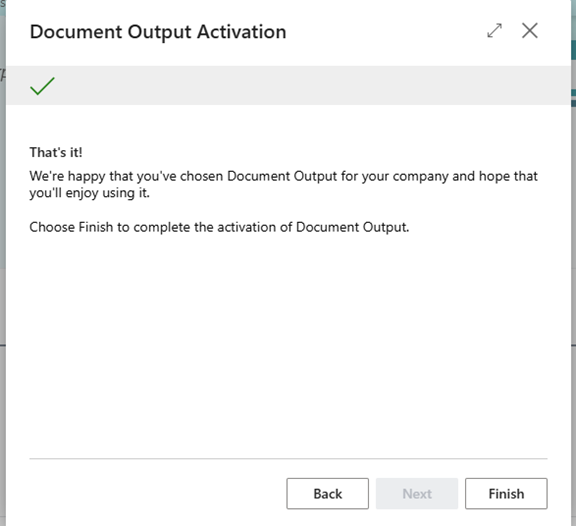
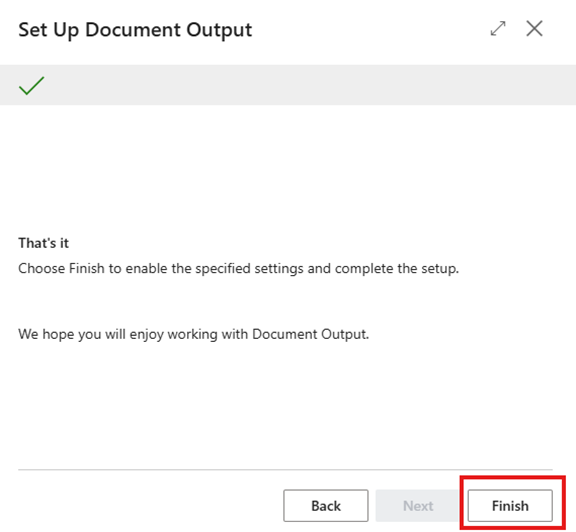
- Finish the guide to complete the configuration.
Wichtig
Activation alone is not enough. You must complete the entire setup guide before eDocuments can be sent.
Step 4 – send an eDocument
Once setup is complete, send eDocuments as follows.
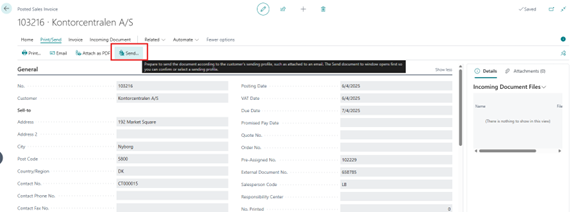
Open the document you want to send.
Select Send.
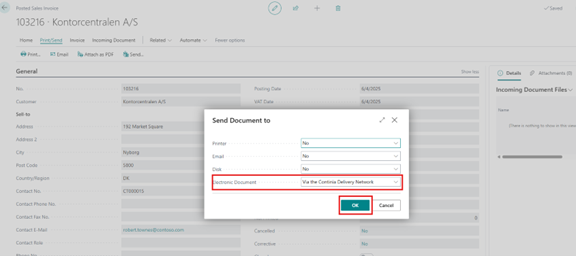
In the send dialog, under Electronic Document, select Via the Continia Delivery Network.
Select OK.
If you try to send before setup is complete
If you attempt to send an eDocument before setup is finished, an error message appears with an action.
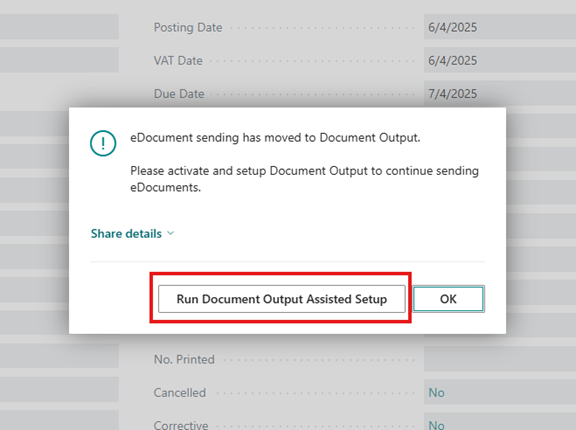
- Select Run Document Output Assisted Setup to complete the required setup.
Scenario B – you used both Document Capture and Document Output in version 27.0
If you previously used Document Capture, had Document Output installed, and sent eDocuments through both products, you need to decide which sending method to keep going forward.
Your two options
Option 1 – keep using XML export (the previous Document Output method)
No action is required right now. Your existing setup continues to work.
Wichtig
Important deadline
XML export will be available until April 2027. After that date, the new Enhanced Continia eDocuments framework becomes mandatory. We recommend planning your migration before then.
Option 2 – switch to the Enhanced Continia eDocuments framework
Run the Set Up eDocuments for Document Output guide. See scenario C below for the detailed steps — they are the same.
Output profile conflicts
Because both products had separate eDocument configurations for the same customers, conflicts are likely when you migrate to version 28.0. The setup wizard detects these automatically.
See Resolving output profile conflicts later in this guide.
Scenario C – you previously used only Document Output
If you already used Continia Document Output in version 27.0, upgrading to version 28.0 does not require any immediate changes. Document Capture is not required and is not installed automatically. Your existing eDocument sending continues to work after the upgrade.
About the Enhanced Continia eDocuments framework
Version 28.0 introduces a new Enhanced Continia eDocuments framework for Document Output. The framework is optional in version 28.0.
Wichtig
Important deadline
The Enhanced Continia eDocuments framework becomes mandatory in April 2027. We recommend enabling it before then so you can plan the change at your own pace.
Enabling the framework
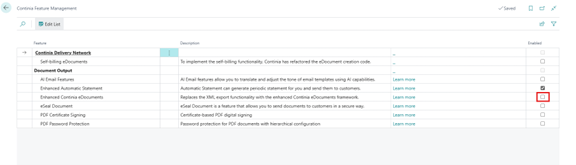
You can enable the framework from the Continia Feature Management page.
When enabled, the Set Up eDocuments for Document Output guide opens automatically.

Running the setup guide manually
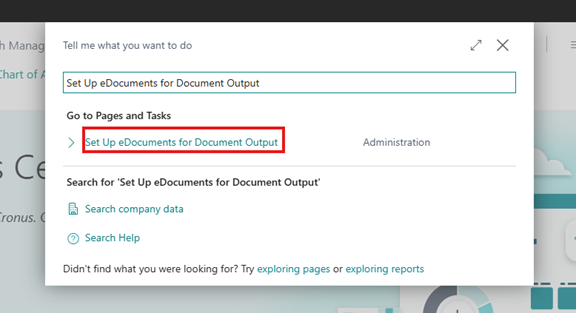
You can also open the guide at any time.
In Business Central, open Search.
Search for Set Up eDocuments for Document Output.
Open the guide.
Select Run to begin configuration.

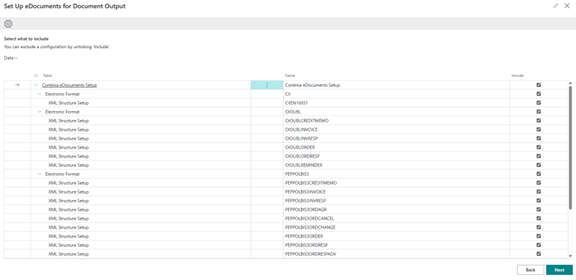
Choose how to import the eDocument configuration. For most users, importing from Online is recommended.
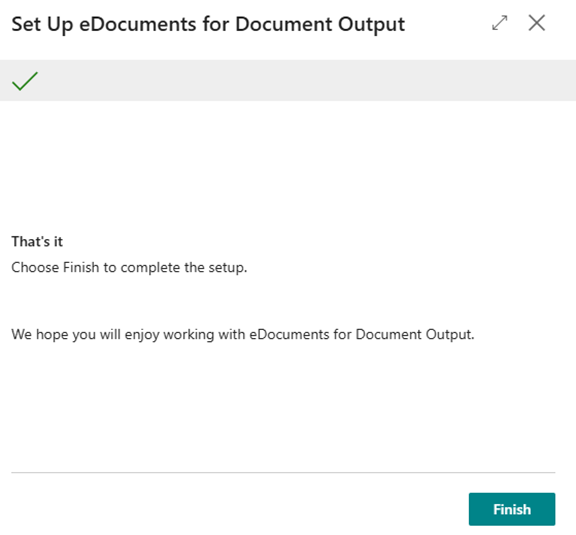
Continue through the remaining setup steps and complete the guide.
Resolving output profile conflicts
When you run the setup wizard, the migration may detect customers where different eDocument configurations result in conflicting output profiles. This can happen when:
- Document Capture and Document Output had separate eDocument configurations for the same customer.
- An existing output profile does not match the configuration assigned by the migration.
The wizard detects these conflicts automatically and shows a resolution step.
When the conflict step appears
If conflicts are found, the wizard shows the Resolve Output Profile Conflicts step after the eDocument configuration import.
If no conflicts are found, this step is skipped.
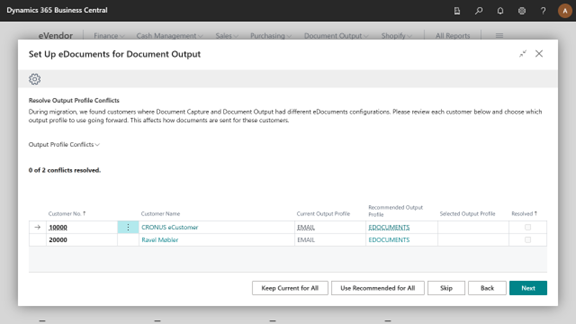
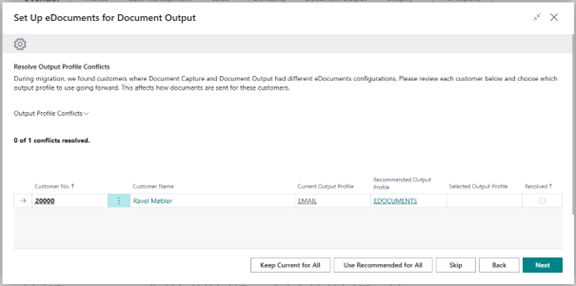
Understanding the conflict list
The conflict list shows each affected customer. Each row contains:
- Customer No. and Customer Name – the affected customer.
- Current Output Profile – the output profile currently assigned to the customer in Document Output.
- Recommended Output Profile – the output profile suggested by the migration.
- Selected Output Profile – the output profile you choose. This is the only editable column.
- Resolved – shows whether you have made a selection for this customer.
A progress indicator at the top shows how many conflicts have been resolved, for example "0 of 2 conflicts resolved".

Resolving conflicts one by one
Find the customer row in the list.
Select the Selected Output Profile field.
Choose an output profile from the dropdown.
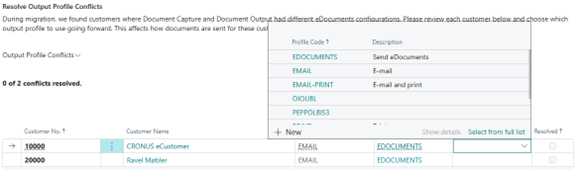
The Resolved column changes to Yes after you make a selection.
You can also right-click a row (or select multiple rows) and choose:
- Keep Current – uses the current Document Output profile.
- Use Recommended – uses the recommended profile.
- Reset – clears the selection and marks the conflict as unresolved.
Resolving all conflicts at once
Use one of the bulk actions at the bottom of the page:
- Keep Current for All – applies the current Document Output profile to every customer.
- Use Recommended for All – applies the recommended profile to every customer.

Skipping conflict resolution
If you are not ready to resolve conflicts, select Skip. A confirmation message appears:
"Are you sure you want to skip? No changes will be applied and any selections you made will be cleared. You can resolve conflicts later by running this wizard again."
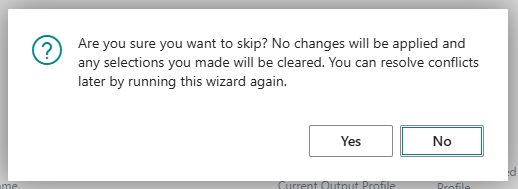
Select Yes to skip. No changes are applied, and all selections are cleared.
Finishing the wizard
When you select Next after the conflict resolution step, the wizard shows a confirmation based on your selections:
If all conflicts are resolved, the wizard confirms how many will be applied.
If some conflicts are resolved, the wizard shows how many are resolved and how many remain (for example, "1 conflicts are resolved and 1 are unresolved").
If no conflicts are resolved, the wizard confirms that nothing will be applied.
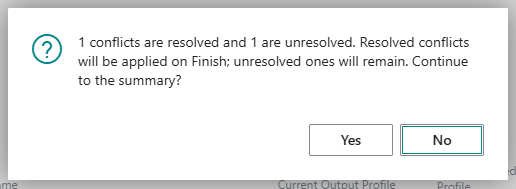
The finish step shows a summary of the outcome.
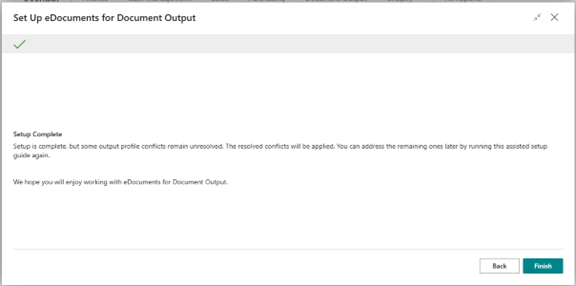
Select Finish to apply the resolved conflicts. Unresolved conflicts remain and can be addressed later.
Notifications for unresolved conflicts
If conflicts remain unresolved, a notification appears when you open any of these pages:
- Role Center
- Posted Sales Invoices and Credit Memos
- Posted Service Invoices and Credit Memos
- Issued Reminders

Select Resolve Conflicts to open the setup wizard directly on the conflict resolution step. Select Don’t show this again to hide the notification.
Returning to resolve conflicts later
You can return to the conflict resolution step at any time.
- In Business Central, open Search.
- Search for Set Up eDocuments for Document Output.
- Open the guide.
If all other setup is complete and conflicts remain, the wizard opens directly on the conflict resolution step.
Tipp
Good to know
Unresolved conflicts do not stop eDocument sending, but they may cause documents to be sent using an unexpected output profile. Resolve all conflicts to ensure correct document delivery for each customer.
New users
New to Document Output
To start sending eDocuments:
- Install Continia Document Output.
- Run the Set Up Document Output guide.
- Complete activation.
- Finish the setup guide.
New to Document Capture
If you want to send Sales eDocuments, Continia Document Output must also be installed and configured. Without activating and setting up Document Output, eDocuments cannot be sent in version 28.0.
If your solution has customizations
If your Business Central solution includes customizations related to XML export or legacy eDocument sending, contact your Continia partner before upgrading. Some legacy customizations may not be compatible with the Enhanced Continia eDocuments framework, and your partner can help you review and adjust them.